Friday, October 19, 2012

Second Day Hair: High Fishtail Pony

Wearing a high pony with a fishtail braid has been another go to of mine since early spring. I only wore it once or twice before the Summer Olympics started, but then! This type of tamed yet jazzed up pony was all over the courts, the volleyball courts! Indoor and sand volleyball and I do love me some volleyball and showing a little Olympic support, so during and since then I have found myself gravitating to this style a bit more. It easy and fuss free just like a pony tail but a little more polished.

Photos of the USA volleyball teams from the 2012 Summer Olympics


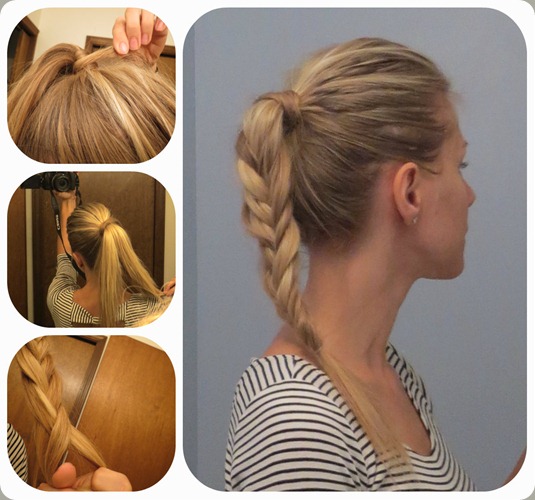
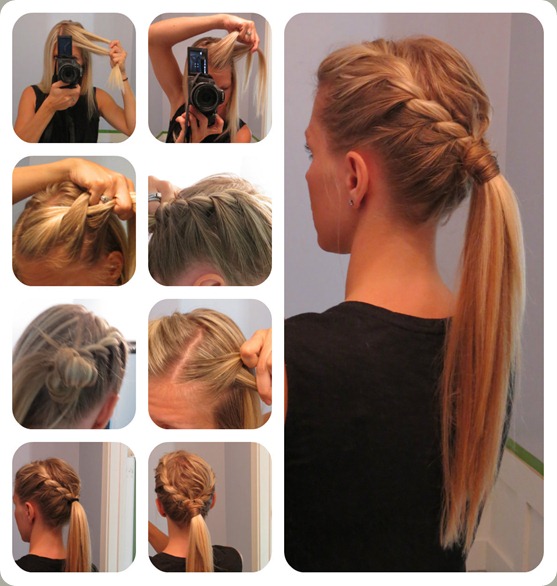
High Fishtail Pony

collage2.jpg

High Fish Tail Pony - Steps:

1. Add some texture to the roots of your hair by using dry shampoo and / or spray hairspray or texture spray into the palm of your hands and then kind of comb it through with your fingers starting right at your roots. I’m not a back comber, it just makes my hair look frizzy and tangled so this is the method I use. But if back combing works for you for volume that’s a great option too.

2. Pull hair into a high pony. Leave a little room to go up. I like to get more volume in the front when I tighten my pony. I separate into two piece and while tugging to tighten I kind of pull up ward and the pony moves up and pushes more volume to the front. After I do that I usually use my fingers and gently tug and pull up at the front part until I get the volume I’m looking for. I kind of have a flat head, hehe.

3. Grab a piece of hair from the middle underside of your pony. wrap around your pony tail holder to conceal it. secure with a bobby pin and smooth with hairspray. Either spray on your hand and smooth or directly on to the wrapped hair,  smooth hair down with your fingers.

4. Separate your pony into two pieces. Grab a small chunk of hair from the outer edge of one side and bring to the other side. Repeat on the other side. The smaller pieces you grab the tighter the fishtail. I generally do it pretty loose so I grab about a third of the side before crossing over. continue until you get close to the bottom, I usually leave about 2-3 inches at the bottom.

5. Secure with a clear rubber band. Gently hair spray

Of course this would also look stellar with a regular braid too!

That’s my Shiny ~ J

Thursday, September 20, 2012

Even Better Fiber and Omega Rich Whole Wheat Banana Muffins (or bread)

You can find the original recipe here if you don’t have maple syrup on hand or if you would just rather use good old fashioned sugar! The morning after I posted this I actually made the muffins again and went for the less sugar option. I actually preferred them! The maple syrup almost made them fluffier. YUM!

Recipe yields 24 muffins or 2 thin loafs of bread


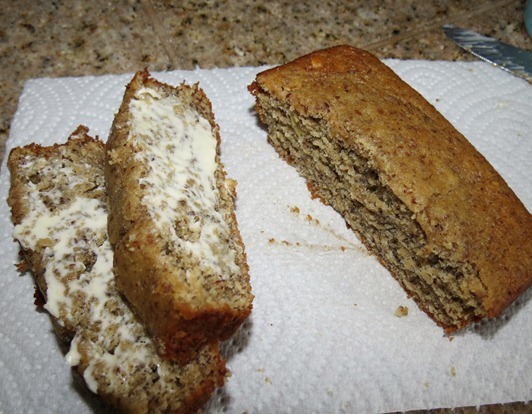
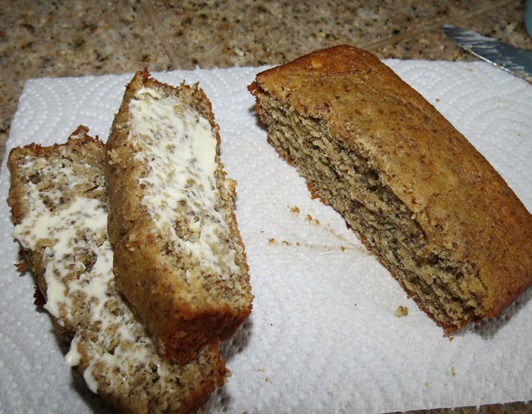
Small loaf with just a few pieces left

IMG_1162_thumb8

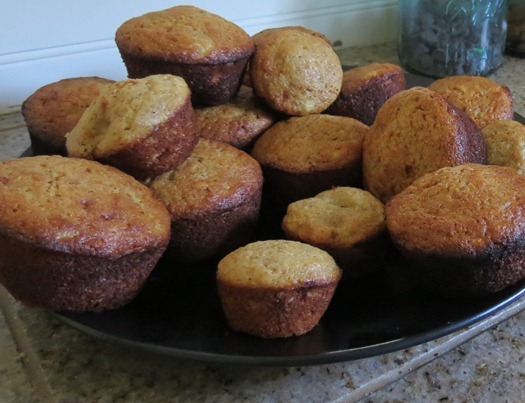
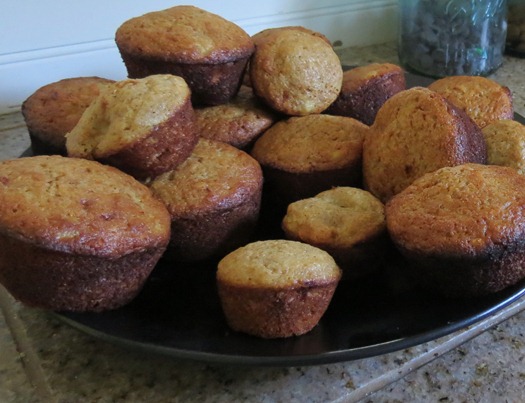
Muffins

IMG_1222.1_thumb4

Ingredients:

2 cups whole wheat flour (I use Trader Joe’s Whole Wheat White Flour)

2 organic eggs

1/4 cup old fashioned oats

1/3 cup ground flax meal (optional, see note below)*

2/3 cup brown sugar (could even reduce to 1/2 cup)

1/4 cup maple syrup

1 1/2 t baking powder

1 t baking soda

1/2 t salt

1 cup mashed bananas (3 large)

3/4 cup sour milk or buttermilk (to make sour milk: add a little less than 1 T lemon juice in measuring cup, pour in milk to reach 3/4 cup, let set for 5 mins)

1/4 cup greek yogurt

1/4 cup butter softened

1 t vanilla

1.Preheat oven to 350. In a large bowl mix dry ingredients together (flour, oats, flax meal, brown sugar, baking powder, baking soda, salt) mix well.

2. Make sour milk (see note above), crack eggs into same measuring cup with milk and whisk together with fork. Add milk and egg mixture to dry mix.

3. Add remaining ingredients to mixture (mashed bananas, greek yogurt, butter, vanilla, maple syrup). Stir together until well mixed.

4. Makes 2 dozen full size muffins or 2 small loafs of bread (or one of each). Scoop batter into greased muffin tin using an ice cream scooper (one full scoop per muffin). Or pour batter into greased and prepared bread pans. Bake muffins for 12-18 mins and bread for 30-35 mins or until knife or tooth pick poked in the center comes out clean.

*Ground flax meal is optional but I wouldn’t leave it out, this AMPS up the health factor by adding lots of fiber and Omega. I use Bob’s Red Mill Whole Ground Flax Meal, I think this also makes the texture and flavor extra yummy! Ground Flax Meal is also a great brain and heart healthy addition to any bread, baked oatmeal or even smoothie recipe!

Happy baking!

That’s my Shiny ~ J

Tuesday, September 18, 2012

Pitting a Black Cherry: A Straw to the Rescue

I’m sure all parents of little ones agree that feeding cherries to those little ones can become quite a chore. Frantically biting through half the cherry, removing the pit with your teeth and then giving over the other half to an almost in tears excited chubby toddler. With pits and juice flying every which way causing quite a scene with little to no enjoyment coming from one of natures most delectable treats all because of these pesky pits!

Now I know there are pitters you can buy but if you are like me buying a cherry pitter crosses your mind, mmmmm only when you are eye-to-eye with those juicy cherries with no additional thought before or after! Enter the straw!

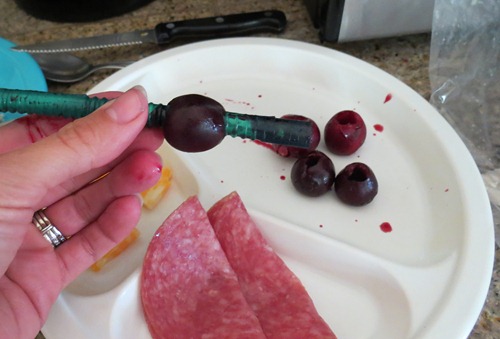
I was battling the gruesome cherry scene with my littlest as she was squawking “bayeees” “bayeees” at me, and I was over it! I wanted to enjoy my OWN cherries and I wanted her to enjoy HER OWN cherries. This was the light bulb moment “if only I had a way to get the pits out”, I would need something hollow and round, BING!!! A straw!!! So I got the straw and with some crazy looks from the Hubs I proceeded to try out my newest “creative” idea. BEHOLD the straw quickly and fairly neatly removed the cherry pit!!

Hooray! One for team Mommy!

IMG_0781

That’s my Shiny ~ J
Friday, September 7, 2012

Fiber and Omega Rich Whole Wheat Banana Muffins (or Bread)

A favorite treat in our house is bread, and banana bread is at the very tippy top of that list. However, I wasn’t finding the “it” banana bread recipe that was the right combination of delicious and healthy. My main motivation for this was my little guy who almost always requests a third (or fourth) muffin for breakfast and I was tired of second guessing giving him more, with this recipe I stopped the second guessing and can now toss that sweet boy another muffin. We also have a MAJOR win in the delicious department, I have made this recipe three times in the last four weeks! The whole family has been asking for more!

I went to work using a banana cake recipe as reference that I have loved for years but tweaked or removed almost all of the not so healthy ingredients and tried to AMP up the health factor with add ins and substitutes. I do hope to tweak one more thing by reducing the sugar, I’m planning to use honey or maple syrup with a smaller amount of sugar. The amount of sugar does seem high but keep in mind this recipe makes 2 dozen muffins or two smaller (thin) loafs of bread. I’ll keep you posted and let you know how the next batch turns out after the sugar swap.


Small loaf with just a few pieces left

IMG_1162

Muffins

IMG_1222.1


Ingredients:

2 cups whole wheat flour (I use Trader Joe’s Whole Wheat White Flour)

2 organic eggs

1/4 cup old fashioned oats

1/3 cup ground flax meal (optional, see note below)*

1 cup brown sugar

1/2 cup white sugar

1 1/2 t baking powder

1 t baking soda

1/2 t salt

1 cup mashed bananas (3 large)

3/4 cup sour milk or buttermilk (to make sour milk: add a little less than 1 T lemon juice in measuring cup, pour in milk to reach 3/4 cup, let set for 5 mins)

1/4 cup greek yogurt

1/4 cup butter softened

1 t vanilla

1.Preheat oven to 350. In a large bowl mix dry ingredients together (flour, oats, flax meal, brown sugar, white sugar, baking powder, baking soda, salt) mix well.

2. Make sour milk (see note above), crack eggs into same measuring cup with milk and whisk together with fork. Add milk and egg mixture to dry mix.

3. Add remaining ingredients to mixture (mashed bananas, greek yogurt, butter, vanilla). Stir together until well mixed.

4. Makes 2 dozen full size muffins or 2 small loafs of bread (or one of each). Scoop batter into greased muffin tin using an ice cream scooper (one full scoop per muffin). Or pour batter into greased and prepared bread pans. Bake muffins for 12-18 mins and bread for 30-35 mins or until knife or tooth pick poked in the center comes out clean.

*Ground flax meal is optional but I wouldn’t leave it out, this AMPS up the health factor by adding lots of fiber and Omega. I use Bob’s Red Mill Whole Ground Flax Meal, I think this also makes the texture and flavor extra yummy! Ground Flax Meal is also a great brain and heart healthy addition to any bread, baked oatmeal or even smoothie recipe! 

Happy baking!

That’s my Shiny ~ J

Wednesday, September 5, 2012

Second Day Hair: Side Twist Pony

I have been growing out my hair ever since I had babies and started the journey as a stay-at-home-Momma. In order to help the growing process along I began to only wash my hair every other day instead of every day. In the past I could never even consider this, my hair just got too greasy after 24 hours. With some time and dry shampoo my scalp adjusted to this routine and now my hair doesn’t get nearly as greasy which is VERY nice. However, most of the time my hair is a bit flat on the second day so I can’t wear it completely down giving me the opportunity to get creative! Especially this summer, it has been so hot and with lots of hair on my back it’s nice to pull it up. So I’ve been sporting a few go to summer friendly hairstyles, but I think this one might be my favorite!

I’ve done this side twist pony a handful of times and enjoy it every time. I usually get a ton of compliments and it only takes about 5 minutes!! Not to mention once it’s up, I don’t have to mess with it for the REST-Of-THE-DAY! 

collage.jpg

Side Twist Pony

Step 1: Side part you hair

Step 2: Start on the side that most your hair is falling on

Step 3: Grab the front section of hair, split in two (see photo above)

Step 4: Twist once, going up, before twisting again grab another section of hair from below near your ear, like French braiding but only grabbing hair from one side. (see photo above)

Step 5: Continue with the process of grabbing hair from the one side and twisting until you reach the back of your head, grab a hair tie and put the portion of hair that you have twisted in a tight messy knot and out of the way (see photo above).

Step 6: Repeat steps as above on the other side of your hair, all of your hair should be up and twisted in side one or side two

Step 7: Once your hair is twisted all the way to the back on the second side, hold that portion tightly with your hand. With that same hand grab the first side that is in the pony tail holder near the base and carefully undo the holder with your other hand.  Keep a tight hold on both sides and rewrap the pony tail holder tightly around your hair (including both sides) in a pony.

Step 8: Grab a section of hair from the middle underside of your pony tail, wrap that piece of hair around the pony tail holder to conceal it completely, secure with bobby pin and smooth any loose piece with hairspray. Spray the whole pony and twist lightly to hold.

Have fun twisting!!

That’s my Shiny ~

J
Wednesday, July 18, 2012

Our Favorite New Burger: Turkey Feta Spinach Burgers

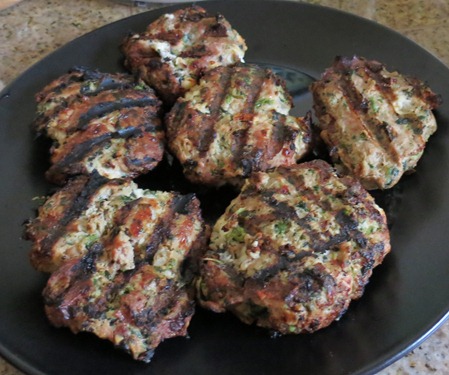
In the rush to put something together for an impromptu Mother’s day grill out with my in-laws, I thought through the food I had on hand and inspiration struck. Since then we have been enjoying these turkey burgers REGULARLY this summer. We have been devouring these yummies a couple times a month.

IMG_0045

Ingredients:

1.5 lbs ground turkey

1 package frozen spinach, thawed and excess water removed (see tip below)

1/2 onion chopped (optional)

1/2 cup feta cheese

salt and pepper to taste

dash of nutmeg (optional)

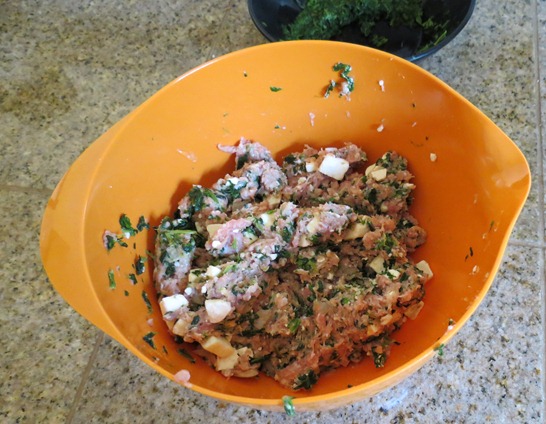
How To:                                                                                                                                                           Mix all ingredients together in a large bowl. Eyeball the spinach, I usually add about 3/4 of the spinach otherwise the consistency isn’t as good but your preference might be more or less.

IMG_0041

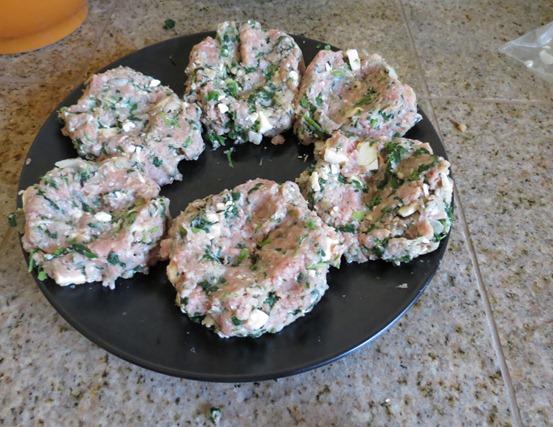
Separate meat mixture into patties.

IMG_0042

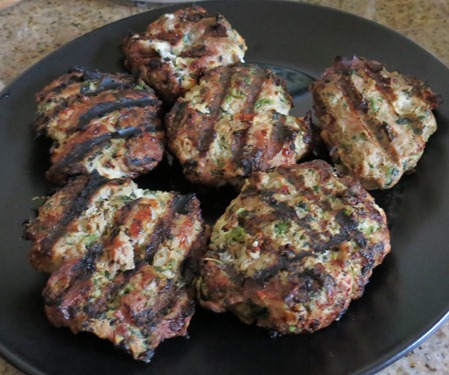
Grill outdoors or cook indoors in a cast iron skillet or grill pan until cooked through. Enjoy on a bun with your favorite burger toppings.

IMG_0045

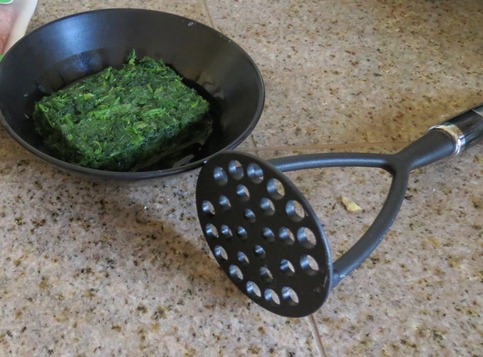
Spinach Tip: For the longest time I dreaded using frozen spinach due to the difficulty in draining it, I’ve tried Rachel Ray’s tip of squeezing the excess liquid out by placing the spinach in a dish towel and squeezing. I didn’t like the mess or how HOT the water was on my hands. So I started using my potato masher! (see photo below). In the same bowl you defrosted the spinach in, press your potato masher into the spinach to hold it back and to push out the liquid, carefully pour out the excess liquid. Move your way around the edge of the bowl until all the water is removed from the spinach. IMG_0039

I really LOVE this burger because it’s turkey, the extra delicious flavor the feta cheese adds, the health and veggie factor and my kids love it too! Hey and not to mention if momma needs a break this all in one burger and veggie combo can make dinner super simple, throw a bag of multi-grain tortilla chips on the table and you’ve got a healthy dinner!

Have you stumbled into any new recipes that you are loving this summer??

That’s my Shiny ~

J

Sunday, July 15, 2012

A Tardy Recap of a Great Road Trip

In April our family went on a two week long hiatus, sabbatical and respite. All four of us needed some time to relax  and take a break for our daily duties and just have some fun as a family making memories.

We had about the best time you could think of! First the kids and I took off for Kentucky and spent a week there with my sister and family. Then the Hubs meet us in Lexington for the Easter weekend and from there we kept the mini-van moving and headed on to Gulf Shores, Alabama.

Our time in Lexington, Kentucky was wonderful. We did lots of family things. We went to a zoo wildlife place, celebrated a birthday, helped my sister register for baby gear, went to horse races, learned the C-A-T-S, Cats, Cats Cats cheer, watched UK win the championship in Lexington, Kentucky (we avoided being involved in the couch burning), ate lots of yummy food, celebrated Easter and just had a wonderful time together.

IMG_0729

IMG_0742

IMG_0700 

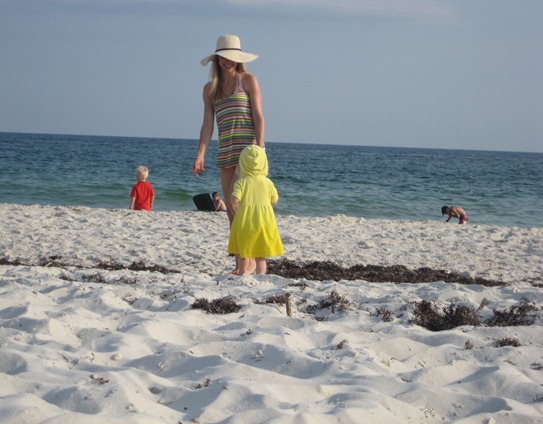
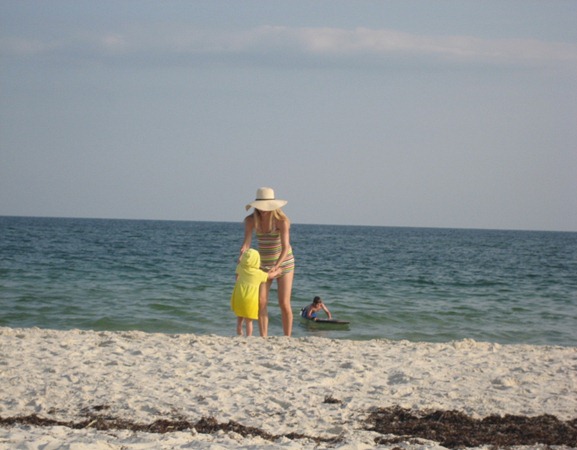
The trip to Gulf Shores was incredible! AHHH Gulf Shores, it was like a big deep breath of fresh air. We couldn’t have had a better time, it was a beautiful, relaxing, kid friendly, rejuvenating, romantic and couldn’t have been more of a perfect trip. We’ve only done the family vacation / road trip thing one other time and this time we really got the hang of it. We not only ensured the kids had fun and were entertained but WE THE PARENTS actually let ourselves relax and kick back too! Including taking naps, eating at places WE enjoyed and doing activities that were fun for all four of us! It was the perfect balance of kid and adult fun! We all agreed that our favorite activity was the dolphin cruise but honestly the BEST part about our vacation was the 30 foot balcony over looking the ocean, nap time and early bed times have never been more enjoyed!

The kiddos loved the balcony too!

IMG_0795

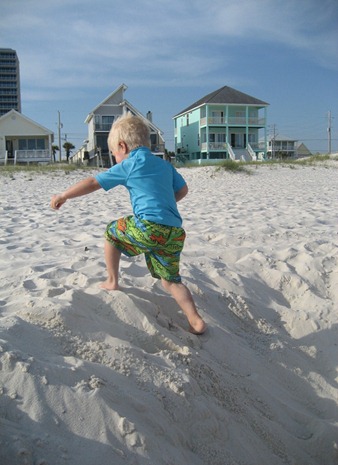
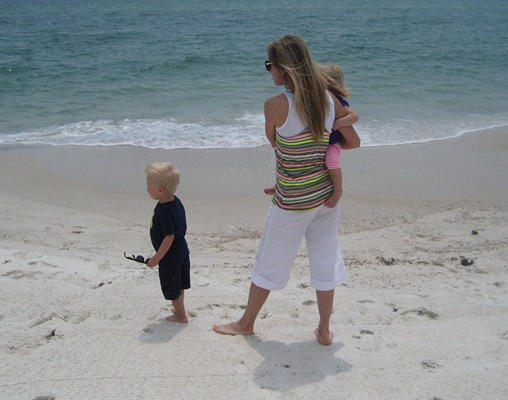
The kids enjoying the beautiful white sandy beach.

IMG_0841

At the Gulf Shores Zoo checking out a lioness, she even roared for us!

IMG_0967

Strolling on the beach.

IMG_1020

Enjoying their surroundings. We stopped and had a picnic lunch at a pavilion located between Gulf Shores and Orange Beach

IMG_1039

IMG_1053

IMG_1059

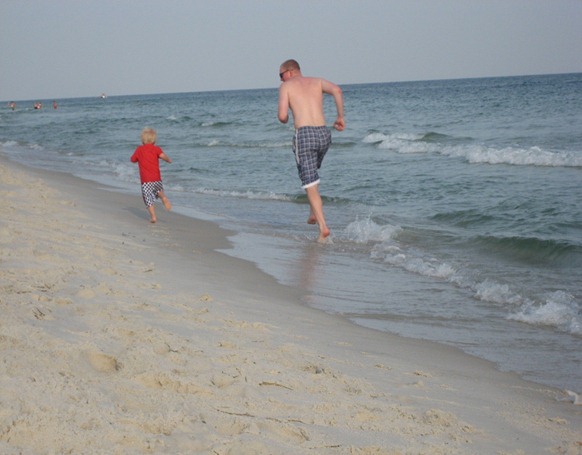
An evening of fun on the beach. 

IMG_1079

IMG_1080

I couldn’t love these guys or these moments more! Ready-Set-Go!!!

IMG_1086

IMG_1109

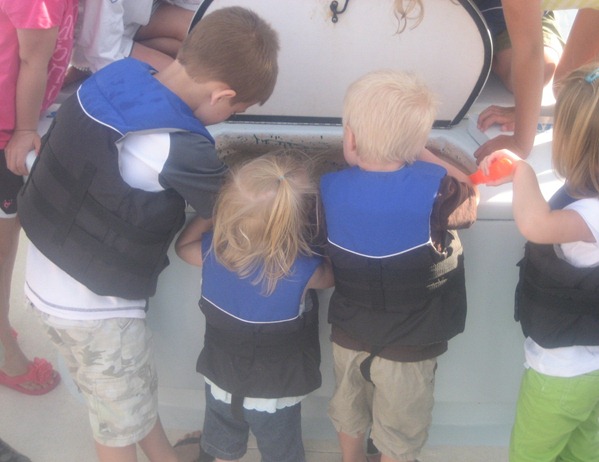
Wading in the water at “The Pass”. We found hermit crabs, jelly bellies and saw a ton of cranes and pelicans!

IMG_1145

IMG_1149

The Dolphin Cruise. The boat ride alone was incredible but seeing those dolphins that close jumping through the air was just unreal! We didn’t even zoom for these pictures!

IMG_1159

IMG_1191

IMG_1201

IMG_1221

IMG_1224

More balcony time, we lived out there.

IMG_1234

At Fort Morgan beach.

IMG_1236

IMG_1243

IMG_1259

Our signature vacation sign off photo.

IMG_1298

This family highly recommends Gulf Shoes, Alabama!

What are some of your favorite road trip destinations? 

That’s my Shiny ~ J

Thursday, July 12, 2012

Speed Bump

Hi friends. I’m back. After a too long break. I didn’t want to take a break but life got the best of me the last couple months. After an amazingly wonderful vacation (I did write a post on but never published, I will do that shortly) the wheels of life got shaky for me. ALL of these bumps were honestly nothing major but everything hit at the same time. I struggled. It felt like in ALMOST all parts of life I would make two strides forward and immediately fall one step back if not two. It was just a big jumble of the flu, ear infections and allergic reactions. Which resulted in me being so distracted I was regularly forgetting something or totally bombing something else. Most of my missteps were so minuscule the only person that realized I messed it up was me, but I beat myself up. I wasn’t giving myself a break about anything I was even blaming myself for things out of my control like the bunnies eating all of the flowers I had just planted or UPS losing our newly purchased patio table. 

with her.jpg

There are worse things in the world than hives, ear infections and hungry bunnies. I know that I am blessed. I am so VERY grateful for my wonderful husband who on my WORST days always tells me that I am the BEST and for my beautiful kids who know just when Momma’s about to break and give me a sweet snuggle. These last few months weren’t so much about my circumstances but more about my pride in managing the circumstances MYSELF and not with God. I learned my lesson, I can’t do this alone! These overwhelming moments can be times in life when we grow the most. It shows us our faults our weaknesses and gives us the opportunity to do better, to be better. These last few months have done that for me. I feel stronger because of it. Sometimes true strength can only be found in vulnerability by admitting our weaknesses and imperfections.    

The unfortunate part is that my break from blogging started as a choice because I was managing my family and that came first but the further I got from it the more I let fear creep in. You know “you are FAILING at everything why would anyone want to read what you have to say”. Yea, that guy, that guy who wants me to feel like junk, who hopes I never feel another positive day or thought in my life. That guy can go right back from where he came from, SEE YOU LATER DUDE!!

My pride is stripped my strength renewed and I am thankful that I am starting to feel like my optimistic self again.

That’s my Shiny ~ J

Tuesday, April 17, 2012

Crazy for Cobalt

My Mr. and I often talk about growing old together as I’m sure many married couples do. Our conversations revolve around a few topics, a lake home, our kids maturing and jump suites. Yes, jump suites. We tease each other often and talk about our ever increasing wrinkles and saggy skin as we age. Usually we then immediately transition right into silly discussions of wearing head to toe matching jump suites. The Mr.'s will most likely be white. Mine COBALT BLUE! We’ve had many laughs talking about our future senior selves.

Cobalt is one of the those colors I gravitate to. Whenever an article of clothing is offered in cobalt that is usually my choice. It’s just one of those colors I don’t question wearing. It’s flattering if I’m tan or a little on the pasty side, it compliments my blonde hair and skin and it makes my eyes stand out. Cobalt has got this girl’s back! 

This beautiful blue hue is DEFINITELY a classic but this little classic has been recharged lately and I’ve been seeing a lot of it lately and I LIKE IT! Not only in clothing but also in interiors! I have so desperately wanted to add cobalt to a room in our house, I haven’t had much luck yet but I’m still working on it.

Here are a few of my favorite cobalt infused interiors as of late:

Pinned Image

Pinned Image


Pinned Image

Pinned Image

Pinned Image

Pinned Image

Don’t you just love the richness it adds to a space. Not to mention how good the hue looks in a pattern. I particularly love the ikat fabric in the curtains and office chair above.

I’m so excited about the resurgence of cobalt this spring! I have really been enjoying ogling all of the fashion and dreaming of getting my hands on more cobalt. Here are a few fun fashion finds in the gorg cobalt hue.

This super cute teal and cobalt clutch, trendy but still classic enough to enjoy for years! Shop Ruche: $38.00 

I love the sandals, so simple yet so unique. Target: $18.00

Women's Mossimo® Pinky Geometric Flat Sandal - Assorted Colors.Opens in a new window

I’m loving the pattern and color of this tunic, this would be super fun for date night paired with skinny jeans and flat sandals. Stylish and comfy. Forever 21: $19.80

This is a great easy summer dress. I actually just purchased this, Old Navy was having a $15 dress sale! (price is now a little higher) Old Navy: $20.00

I love these cute earrings that are perfectly on trend. Shop Ruche: $27.99 

Cute and on trend

A fun short in a pop of color. Victoria Secret: $39.50

Have a little fun with these, color block cobalt and teal peep toe platforms. Target: $29.99

Women's Mossimo® Papina Peep Toe Heel - Black Patent.Opens in a new window

This is a great top that could be worn for many seasons and won’t go out of style anytime soon (the dots are actually shimmery gold!!). Francesca’s Collection: $34.00

Golden Apple Top

A little treat and for some impractical drooling:

These Christian Louboutin heels with cobalt shimmery toe detail. The famous designer’s shoes are on clearance, a steal at only $125.00. That’s quite the discount considering these normally retail close to $500 a pair! Still far out of my reach but a girl can dream! 

On a side note, it looks like shades of green or teal paired with cobalt is all the rage this spring season (check it out in many of the examples above).

Just for giggles, this is what I hope to be rocking in about 40 years (is it bad that I already kind of like this?) hehe. Now I just need to find a white one for my Mr.

Nike Ladies Packable Rain Suit


What’s your favorite color in interiors or fashion this spring? Have you been able to incorporate it into your home or everyday style? Do you have a signature color that you always gravitate to?

Go get your cobalt on!

That’s my Shiny ~

J